Stove-top winter smoking for fruity folks like me
It’s winter so most of us, even here in coastal California, have put away our BBQ’s, but that doesn’t mean we aren’t smoking anything, it is after all California. Learning the art of indoor, stove-top smoking, offers great reward in terms of adding depth, flavor and deep character to dishes where a little smoke essence goes a long way.
Inspired by a smoked passion fruit and pineapple jam left at my house recently, by a friend who works at Good Food Awards , I went on a smoked mango-jam quest. I wondered why couldn’t do this on my stove top with mangoes and an hour of free time. The idea of pulling out the smoker or even the big BBQ smoker seems rather dumb for such intricate and small projects. I have smoked a few things on my stove-top (mostly tomatoes) and always enjoyed the results. It’s rather simple, not very time consuming and offers light smoke flavoring for scant amounts and or more delicate ingredients.
With the stove top method, you won’t achieve the all-day, deeply-penetrated, smoked flavor that big hunks of meat get when in the smoker for hours at a time, but you will get a gentle, smoke-kissed essence; that I find more appealing for fruits and vegetables.
There are so many ways of achieving this indoor smoke flavor. Indoor smoke cooking technology is evolving rapidly with countless new products popping up daily. You can buy smoker bags in various flavors of wood and bake and smoke infuse your food right in them. Indoor smoke chips are available in countless “flavors” and essences and are smaller (in some cases very fine). I bought some from Food 52 , that I use both indoors and outdoors. The fact that they are smaller and finer, allows them to smoke faster, making it so you can infuse the item with smoke without cooking it too long. The small and fine chips, unlike the bigger ones don’t smoke for long.
And then of course there is the SMOKING GUN, which I just decided (literally just now) I need. It’s impossible not to change the texture of whatever you are smoking with almost any method and the smoking gun solves this problem and also works with liquids- I see cocktail in my future as well as some sort of smoked ice cream.
There are plenty of gadgets I don’t think we need and an actually stove-top smoker pan is one of those. It’s too easy to make your own smoker with what you have on hand.

My preferred DIY method, when it comes to indoor smoking, is the wok method, I certainly don’t use my wok for much else. You can also use a deep and wide soup pan with my method. My wok doesn’t have a big bubble lid so I use a round-wire cake cooling rack set down inside mine so I can use the regular lid and still allow for the ingredients which I am smoking to have room, this works also with the big soup pan. ( I have also been know to use wooden skewers as a rack. Once the wok is foil-lined I place wood chips (the small fine ones) , in the bottom of the pan with other smoking ingredients like spices sugar and tea leaves- genius- tea leaves! (I learned this from Serious Eats)
This stove-top method offers me more creativity than an outdoor smoker. I can add spices, herbs, sugars and other smoking enhancers that would burn off way too quickly outdoors and thus allowing for more creative smoky flavors on intricate items such as fruits and vegetables.
Here is a wonderful recipe I came up with for a recent holiday party using the stove-top smoker method to infuse smoke flavor into mangoes.
A present from me to you……
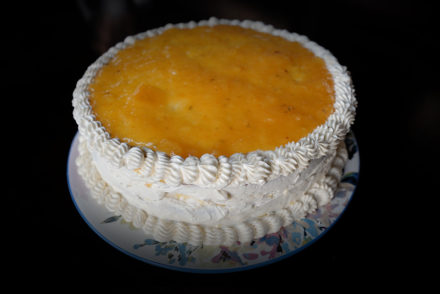
Vanilla Smoked Mango Jam Brie Puff Present
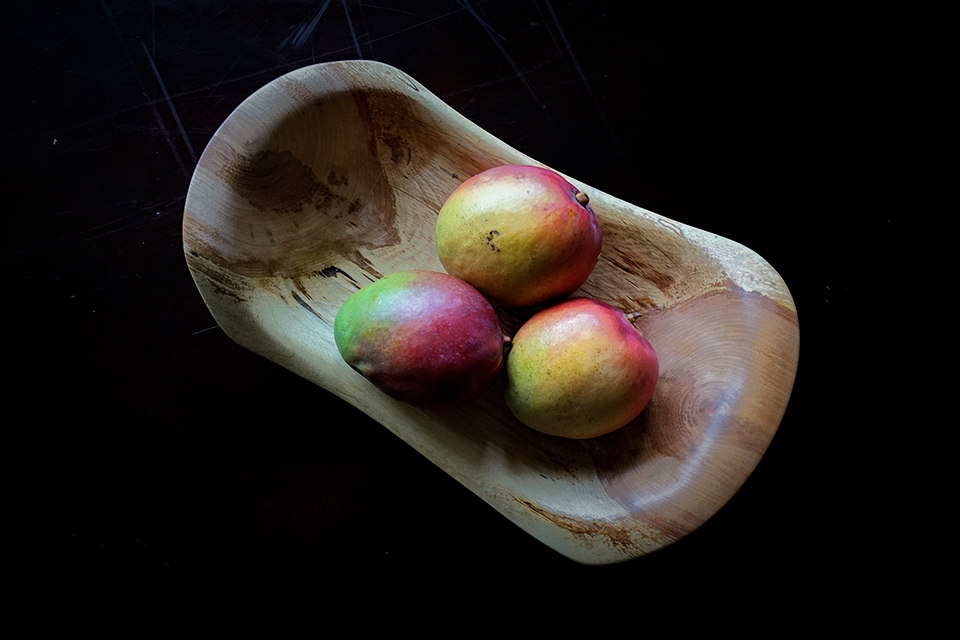
I use dried Madagascar vanilla beans and alder wood-chips ( the fine ones) for the base of my smoking ingredients. I also added some cardamom, star-anise and cinnamon to accentuate the earthy essence of the alder. You will need 4 mango cheeks for this recipe. Using the HACK METHOD to cut the mango is the best method to extract the cheeks.
Serves 10-15 people as an appetizer
Ingredients
For the smoked mangoes and vanilla beans
*wok and tin foil are needed for the DIY smoker
1/2 cup alder wood chips (small or fine indoor variety) soaked for a few hours
1 cardamom pod, husked and seeds cracked
1 star anise, cracked
1 cinnamon stick, cracked
½ cup white sugar
2 dried Madagascar vanilla beans, split open
2 large mango cheeks, skins removed, 2 large mangoes cut using the hack method
½ teaspoon smoked alder salt
1 sheet frozen puff pastry- thawed
1 round brie cheese (8-12 ounces)
1 egg, beaten


Directions
For the smoked mangoes
Prepare the wok as instructed here, by covering with tin foil.
Mix together the wood chips, cardamom, star anise, cinnamon and sugar. Scrape out one vanilla bean ( set other bean aside for now) and place the vanilla paste into the alder sugar mix. Cut the scraped bean into small ½ inch pieces and also place with the alder, mix together.
Place the alder mixture in the wok and place the wok on a burner. Set the round rack over the alder mix and turn the burner up to medium-high. The wok will take about 5 minutes total to heat up enough to begin to burn the items, the sugar will begin to burn first. Once the sugar starts burning and smoke appears, place the two mango cheeks, flat side down on the rack. Place the remaining vanilla bean, also down on the rack, being careful to arrange it so it won’t fall in. Make sure to leave space so that there is ample circulation around the mangoes. Cover the mangoes with a tight fitting lid or aluminum foil ( carefully as the pan will be very hot).
Set a timer for 12 minutes and allow the wok to burn the items and smoke the mangoes. Once the timer goes off, turn the burner off and let sit for 30 more minutes, without opening the pan.

For the jam
Place a plate in the freezer (this is for testing if the jam is done later.)
Combine the mango, sugar, salt and vanilla bean in large heavy bottom saucepan and mix to combine. Place the pot on the stove on medium high heat. Stir well, making sure to mix in all the sugar so it begins to dissolve with the heat. Make sure to scrape the bottom of the pan often, to keep it from burning or sticking to the bottom. Cook on medium-high heat for a total of 20 minutes, paying attention and stirring often. Turn the heat down to low and continue to cook and stir another 15-20 minutes or until the jam is to your desired thickness. The jam should be thick and jammy and not slide off your spoon easily. Once you believe the jam is near done and before testing with the plate, add the butter and stir well, cooking another 1-2 minutes.
Take your plate out of the freezer to test your jam. Place a small spoonful on your cold plate and poke your finger in the jam. The jam should stay firm as opposed to running into the crevice you just made with your finger. If the jam is still runny or loose allow it to cook again (on high heat) another 3-4 minutes and test again. Make sure you put the plate back in the freezer in between.
Place the jam in a jar or jars and let stand uncovered to cool completely.

For the puff present
Pre-heat oven to 400 degrees F.
Roll out the puff pastry, gently on a lightly dusted surface or in-between two pieces of parchment paper( my favorite method). The goal is to get the piece even and thinner than its packaged version.
Place one of the pieces of parchment paper on a baking sheet and then place the rolled puff pastry in the center of that baking sheet. In the very center of the pastry, place a thin layer of jam about an inch larger than the size of the brie (approximate measurements are fine). Place the brie on top of the jam that was spread and add another thick layer over the top of the brie as well as the sides.
At this point I carve off any of the puff pastry that appears like it won’t be used to wrap the brie. I save this and use for decoration. Wrap the jam covered brie, forming a little package and press and seal up the edges in the center. Flip over the brie, seam sides down, on the parchment paper. Decorate is desired. Brush the wrapped brie in the egg.
Place the brie in the oven and bake for about 30-35 minutes or until golden brown. Allow the cheese to firm up a bit and cool for about 15 minutes before serving.


No Comments